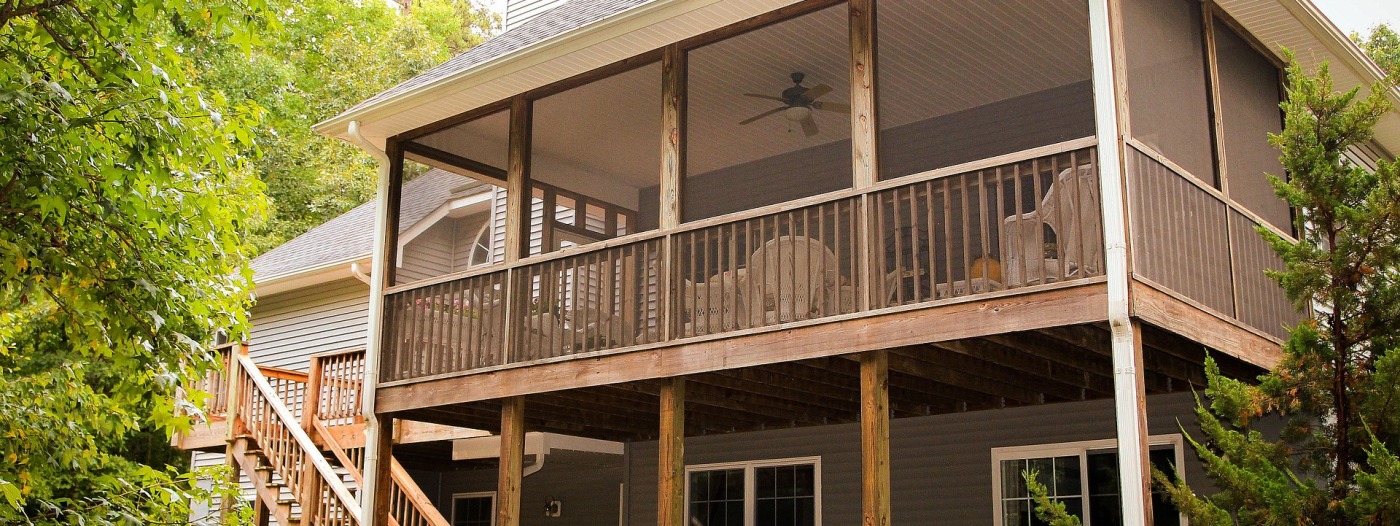
7 Steps To A Successful Deck Renovation

The image of a beautiful, well-built deck is often something that homeowners hope to achieve. Adding outdoor living space in the form of a deck can be an excellent way to increase your property value and provide an incredibly enjoyable place to relax with friends or family. In order to construct the perfect deck for you and your lifestyle though, it may take some consideration as to what features are most important.

If you want help along the way, follow these seven steps for constructing your own magnificent deck:

1) Look into regulations – Before beginning any construction work on a new or existing home improvement project, it’s typically good practice to know what restrictions are currently in place. For example, were you aware that decks over certain heights require permits? Check with your local city’s building department to ensure that you are aware of all the necessary codes.

2) Choose the right builder – If you’re looking for a professional builder to construct your deck then you should check out reviews online as well as the Better Business Bureau before making contact. You want to work with someone who is fully licensed and has experience constructing decks in your area. A few good questions to ask include:

– Are they a member of any professional organizations such as the Master Builders Association?

– What kind of references do they provide?

– Do they follow industry standards or do they offer custom options?

3) Plot out your deck design – Once you’ve chosen the right builder for the job, it’s time to move on to designing your deck. You might want to begin with a sketch of what you want but don’t be surprised if changes along the way seem necessary. Your plans will need to include important details such as:

– What kind of materials will you use (wood, composite decking, etc.)?

– How many people do you intend for this space to serve?

– Will the deck require additional lighting or electrical wiring?

4) Find help with building permits – Although small decks may not require a permit, larger structures built over 24 feet in length can come into play here. Check with your local city government to be sure.

5) Order materials – After you’ve received necessary permits, it’s time to start ordering the actual materials for your deck. If there are size or type restrictions that come along with those building permits then make sure you address them at this point in the process as well.

6) Hire help in order to assist with construction – Building a deck can have certain complications and potential problems that arise during installation. In order to avoid headaches down the line, hire a professional who has experience assisting with deck construction projects. You’ll also want additional hands in case more than one person is required on-site for the day of work.

7) Move on to insurance considerations – Homeowners may be surprised to learn that they are required by law to carry liability insurance on their property. This includes any new additions and renovations, including a new deck. It’s important to check into these rules in your area because the cost of having an extra policy can be minimal compared with potential costs from accidents or legal issues down the road.

You’ll want to ensure you have everything covered when you add a deck to your home, especially when it comes time for renovations later on! If anything goes wrong during installation, call for help immediately as there could be dangers involved with falling materials or dealing with electrocution in the rain. If everything is building up nicely however, enjoy your beautiful outdoor space and invite friends over often!

How to select the best project management software?

Freelancer browsing laptop and taking notes in notebook during workIn a project management software comparison, I usually ask this question: What is your priority? Some clients answer that they are looking for affordable software without too many confusing settings and options. I think we all can agree on those requirements. In such cases, the product should be easy to use and not too difficult otherwise it would be pointless to implement or use it. But what happens if one of those features you’d really like in the application isn’t available? Well then, you have to compromise. Do you want to go with a cheap but less usable solution? And here comes another form of price calculation – cost-benefit analysis which will include both quality (features) and price as well as convenience factors (compatibility; ease of installation; customer support; etc.).

Let’s look at the answer from another aspect. What is important to you? For many users, the project management software comparison should pay attention to its functionality and options. The more features it has, the better if you want to ensure that your operations will go smoothly. If there are several solutions for productivity project management available in your area but one of them seems to have some limitations, then I would advise you not to choose this option too hastily. Take a closer look at what other companies do who already tried using these applications or make a product comparison so that you know which tools might be more helpful. Tell me about your experience with those kinds of software if they’ve been used before because our article on the advantages and disadvantages of project management software will be much appreciated by everyone who cares about the topic.

It is also important to find out what additional features you might need. For instance, do you have an international team? Or are there any specific requirements regarding your work with clients from abroad? If it is a global organization, then look for a tool that allows managing projects in different time zones. In addition, some product comparison articles mention issues that should be kept in mind when selecting the application used by project managers:

  • Busy female freelancer with laptop and notepad in kitchenCheck if support services are available 24/7;
  • Identify which areas you need to keep informed about and how often would you like to receive such reports;
  • Make sure you know what other options can be used for communication with team members, clients and other stakeholders (e.g. Skype, Twitter, etc.);
  • The cloud application should allow you to access your data from any device at any time. You don’t want to lose time looking for information when you need it most;
  • Check if the interface fits your needs and is convenient in use;
  • Do not get confused by the numerous features offered by some products because they may affect performance.

The answers to those questions will help you create your own personalized project management software comparison chart which can then easily be compared against another feature set of its counterparts in our reviews section or elsewhere online so that you can see which setting would suit your specific project requirements and business needs the best. Good luck with your search for a better solution!

7 Tips To Change The Bathroom Image And Not Die Trying

Changing the bathroom look is an exciting and fun home project and an activity you may be considering now that we’ve been spending more time at home.

In this sense, since the year is coming to an end, we have decided to make an article with the 7 tips to change the image of the bathroom and have the expected success.

  1. Have a plan before you start changing the bathroom look. Don’t start your bathroom remodel until you have everything you need. Protect your assets and personal belongings by hiring certified and insured personnel to bring your project to life.
  2. Choose something timeless. Bathroom makeovers take time and effort. In addition, in some cases, depending on what you are looking for, they can be expensive, so it is best to choose wisely and stick with a design that will not be outdated in a short time. To know what to choose, nothing better than to consult an expert in redecorating the bathroom.
  3. Renovating an existing space or building a new bathroom is a huge investment of time and resources.  While the Internet provides access to all the products and services you might need for a bathroom makeover, the amount of information available online can be overwhelming, contributes to unrealistic expectations, and raises stress levels. Those pitfalls can be avoided if you trust a professional who designs and specifies hundreds of bathrooms a year and knows how to bring order out of chaos.
  4. Design an open and functional space. To make your bathroom feel bigger, think of clear, airy and clean lines. Start with light monochromatic colors, tile from floor to ceiling, add mirrors to the wall, install a glass shower door, light up the mirror, install a sliding door, and use high-gloss paint to reflect the light.
  5. The bathroom sets the mood for the beginning and end of the day, so why not make it the perfect setting for the occasion?  Beautiful modern cabinets are a perfect anchor piece for the bathroom setting. Whether you want walnut, painted, or high-gloss cabinets, you can accentuate functionality with an abundance of drawers and unique solutions to make this room functional and beautiful for any time of day.
  6. Think about the future. Consider future needs! When properly adapted to your future needs during a bathroom makeover, you can ensure that you and your loved ones can age in your place for years to come, no matter what the future holds.
  7. Create a relaxing and rejuvenating space. Breathe in some new health in your bathroom. As we are forced to change our lifestyle, having a quiet and relaxing retreat where we can recharge and get away from it all is even more important. The deep soaking tub along with a steam shower can create the perfect escape and be a great addition to your bathroom makeover.

Scuba Diving in Aqaba: our experience

When we planned our route through Jordan, we knew we had to make a stop in Aqaba. Since we took the Open Water diving course, if we have the opportunity to dive on our trips, we reserve a few days on our route to enjoy this activity. In this post, we tell you about our experience diving in Aqaba.

Aqaba City: Where to Stay
Before talking about diving, let's talk about Aqaba. The city of Aqaba is in the south of the country on the shores of the Red Sea. It is bordered by land with Israel and Saudi Arabia and on the shore in front of the Gulf of Aqaba is Egypt. Aqaba is the only seaport in the country and has a special economic status within Jordan: it has a lower tax rate than the rest of the country. In addition, if you arrive in Jordan through Aqaba, either through the port, the airport or at the crossing from Israel or Saudi Arabia, you will get a free visa for Jordan (ASEZ visa), as long as you leave the country in a maximum time of a month and through this same airport.

The city of Aqaba, we are not going to deceive you, we did not like it. It is a coastal city,
with many hotels, shopping centers, casinos, and many alcohol and tobacco shops. In the city, there is a beach where it is not well seen to be wearing a swimsuit or bikini, but you would have to be on the beach with a t-shirt or pants that cover you. That is why it is not recommended to stay in the city if you come looking for diving or snorkeling tourism.

Past the industrial port, 15 kilometers south of the city and just 15 kilometers from the border with Saudi Arabia, are the southern beaches. In these beaches, it is allowed to be in a bathing suit or bikini and they are also the beaches where all the interesting snorkeling and diving spots are, so it is the best area to stay. Keep in mind that the beauty of the beaches in the south of Aqaba are on the seabed because the sand is hard, you could almost say that it looks like land, and full of cigarette butts, so don't imagine an idyllic beach.

Our accommodation
We stayed in the Aqaba Adventure Divers lodgings, the school with which we dive. They
have a complex with rooms, a swimming pool, a restaurant and a diving school. It is very well
equipped and is fully recommended. The only thing more uncomfortable is that it is not on the beach, but you have to cross a highway, so if you don’t have a car you will be a bit "isolated"

The 5 Tips For Building A Wooden Deck

There are many people who would like to have a wooden terrace in their garden. The terrace is, therefore space on which you can rest to fully enjoy the outside of the house. However, to have one, it will already have to be mounted. Properly installing your terrace is a guarantee of its strength and longevity. Discover our advice on how to build a wooden terrace.


Having a terrace is a very pleasant thing for the whole family because they can indeed enjoy the outdoor spaces. To be able to fully enjoy this space, you have to think about the basics before building it. If you are looking for deck builders San Antonio TX, then follow our steps.


wooden deck San Antonio


Choose the location of your terrace


To get the best of the locations, it is advisable to choose as a priority a space that gives both good exposures to the sun, south side if possible, and also a location that is sheltered from bad weather and wind. Once you find a location that combines all of these elements, you can be sure that your patio will have a long life, and your moments of relaxation outside your home will be very enjoyable. However, for a good installation of terraces, you will have to prepare your land well.


Mark the perimeter of your wooden terrace


As we said above, before installing your terrace, you will need to prepare your land. And for that, it is necessary to make a delimitation and a tracing of the terrace. It is a very pleasant activity because the tools used for this step are very funny (the stakes and the ropes). You just need to respect the dimensions recommended by the construction instructions for your terrace to easily draw your terrace. Once this is done, you will see more clearly when laying it. Basically, this is about drawing a life-size plan of your terrace.


Raise height and level your surface with a rake


It is good to lay a terrace, but it is also important to ensure that it does not sag afterward. And for that, you have to work in the field. The suitable tool for this is the rake. During this phase, you have to think about the coating of your terrace (significant thickness of formwork boards, slabs and wooden slats, installation of decorative tiles …). This is what professional builders of terraces and carpenters call thickness excavation. It is necessary to plan, on average, about forty centimeters.


Install the support of your terrace


Depending on the wooden deck you want to build, install either concrete blocks, studs, or a concrete screed that will serve as a support for your construction. This step is also very important because it is this support that will hold your patio in place for a long time. So give them special attention.


Cut, install, screw, and unconvert the wooden boards.


Indeed, its stages concern the actual assembly of the terrace. For cutting, which is a fairly technical job, you need to be well equipped and meticulous. Take a tape measure to take the dimensions, a marker to note the cut, and a circular saw for precise and clean cuts. Regarding the installation, it will have to be done well, respecting the limits that you draw beforehand. As for screwing the elements, once the first planks and tiles are installed, you can start fixing the materials, and as tools, you will need screws and an electric screwdriver for your convenience as a handyman.